Most PowerPoint presentations contain a mix of elements that includes text and images. Typically, you don’t want these elements to overlap, because it can make things in the presentation difficult to read.
That’s where using a text wrap can come in. text wrapping creates an invisible border around and image so that text seems to “bounce” off of it, not moving into that space.
When it comes to using PowerPoint and creating text wraps, there’s a catch. You can’t actually do it with one click, as many other tools do. But it can be done.
Here’s our full guide on how to wrap text in PowerPoint!
Manually Create a Wrap

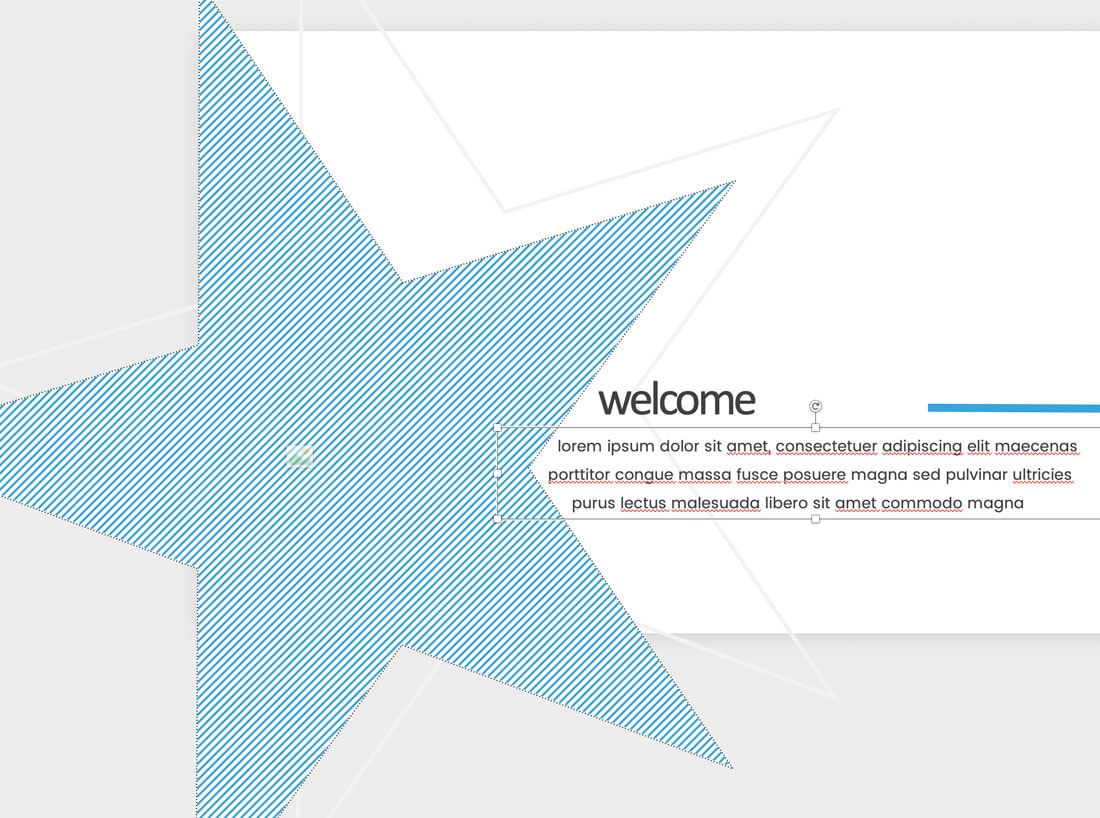
Without a click-to-wrap-text feature, many users use spaces, tabs, and manual controls to create text wraps in PowerPoint.
This method is as simple as using the space bar to move text into the position you need. For most blocks that contain multiple lines of text, you’ll need to create a hard return (using the Return or Enter key on the keyboard) at the start of each new line. Otherwise, spacing changes may not be apparent.
If there is any overlap in image and text elements, such as the star outline above, bring text to the front (using right-click or ctrl-click) so that it is on top of image elements.
Draw Text and Image Frames Separately

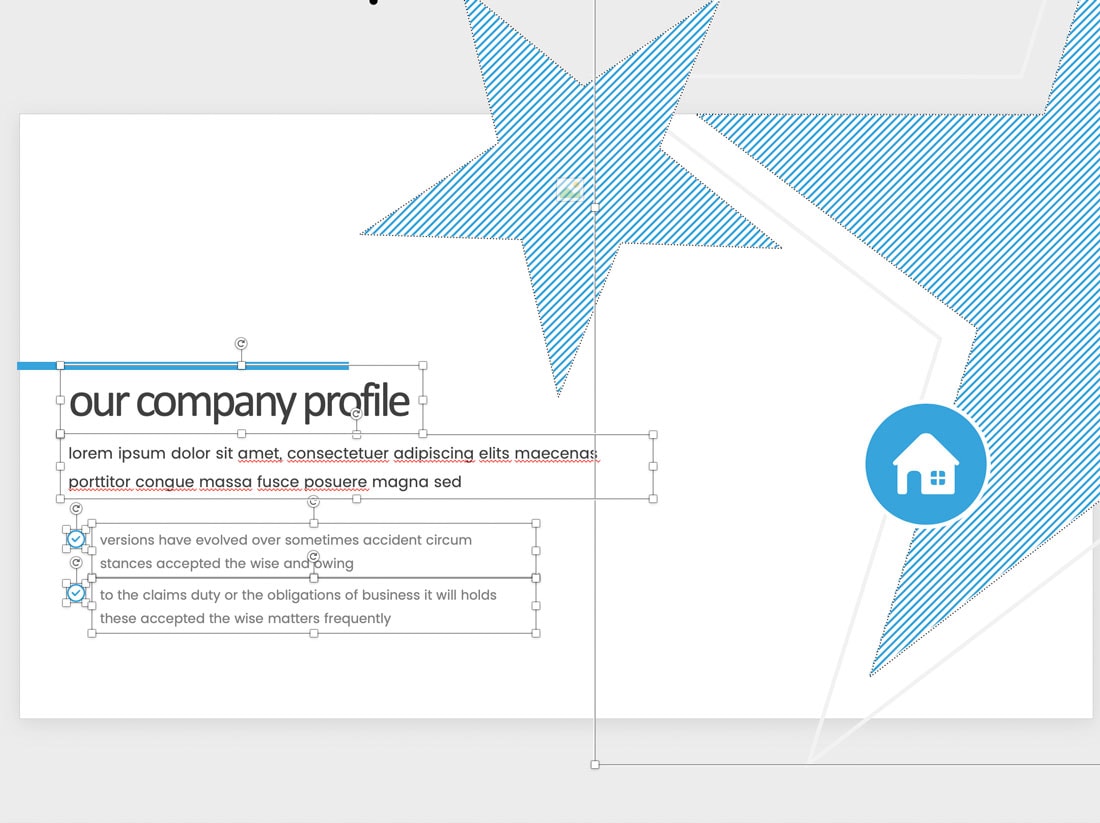
The recommended way to create text and image elements that bounce off one another in PowerPoint is to draw the frames independently so that they do not overlap.
First, place all image elements in the presentation design and send them to the back, using a right-click or ctrl-click.
Then use the handles on each text box to position them so that text frames do no encroach into the image elements. Note on the image above that each frame is drawn to show exactly how wide text can go, so that it seems to wrap around images.
Create Elsewhere and Import
If neither of these methods work for you, the final option is to create the full slide in another program and import it into the PowerPoint presentation.
While this can work great, it can result in some inconsistency between slides or readability concerns if you are not careful.
To do this, create an image and text in another program that has a text wrap function, such as Adobe InDesign or Microsoft Word, save slide content as an image, and import into the presentation as an image.
Bonus Tip: Wrap Text Inside a Shape

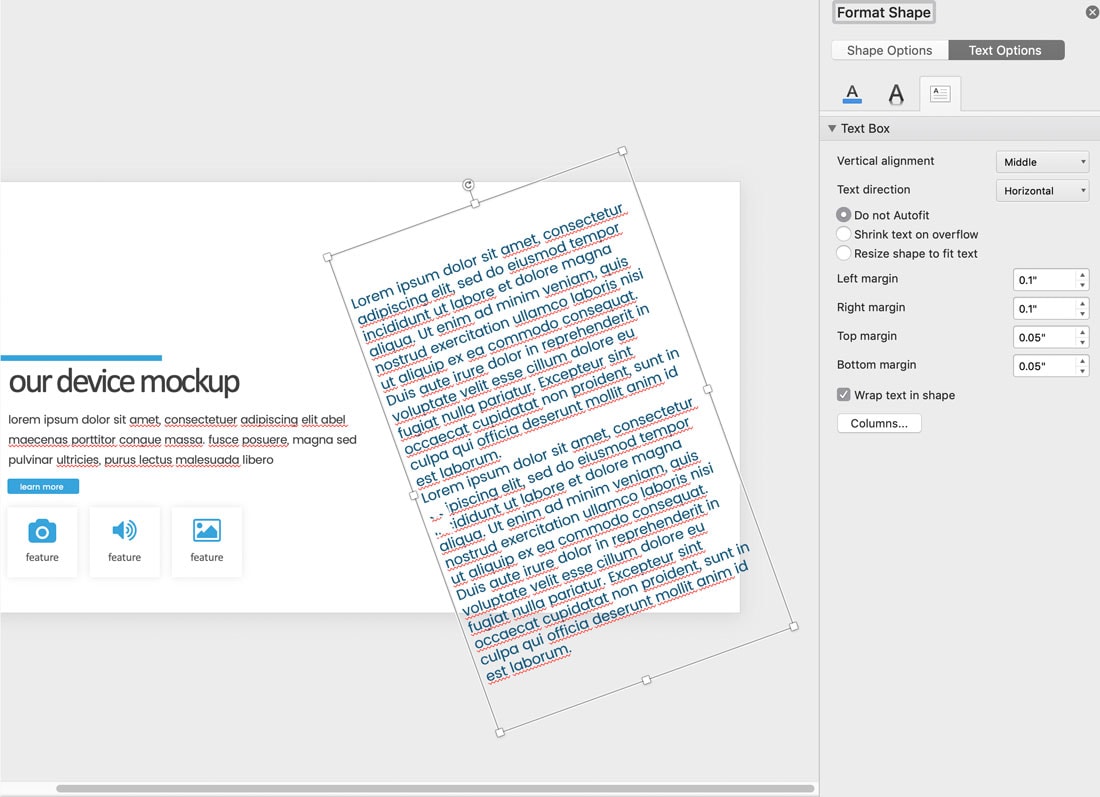
While you can’t create a text wrap around a shape in PowerPoint, you can create a wrap within a shape.
Right-click (or ctrl-click) the shape you want to wrap text inside. Select “Format Shape.”
Click on the Text Options tab, then Text Box and check “Wrap text in shape.”
Any text you put in the shape will be contained within the borders of the shape.
You can use this to style text in different ways and create text elements that will not touch other elements. All of the same styling you use for regular text boxes applies here as well – color, alignment, size, and spacing.
Conclusion
Even though PowerPoint does not have a text wrap function per se, it does have tools that allow you to replicate that functionality. The best option for most users is to draw text and image frames so that they do no intersect.
Don’t forget to take a look at our full PowerPoint templates guide, or our collection of the best PowerPoint templates for your next project!
0 Commentaires