Adobe InDesign is a powerful tool for creating professional-quality layouts and designs for print and digital publications. One of the essential aspects of any design project is typography. Using custom fonts in your InDesign projects can add personality, style, and impact to your work.
In this article, we will guide you through the process of adding fonts to InDesign, enabling you to expand your typographic repertoire and elevate your designs.
Installing Fonts on Your Computer
Before you can use a font in InDesign, you’ll need to install it on your computer. The process of installing fonts varies depending on your operating system.
Installing Fonts on Windows
- Download the font file (usually in .ttf or .otf format) from a reputable source.
- Locate the downloaded font file in your Downloads folder or the folder you specified during the download process.
- Right-click the font file and select “Install” from the context menu. Alternatively, you can double-click the font file to open the font preview window, and then click the “Install” button in the upper-left corner.
Installing Fonts on macOS
- Download the font file (usually in .ttf or .otf format) from a reputable source.
- Locate the downloaded font file in your Downloads folder or the folder you specified during the download process.
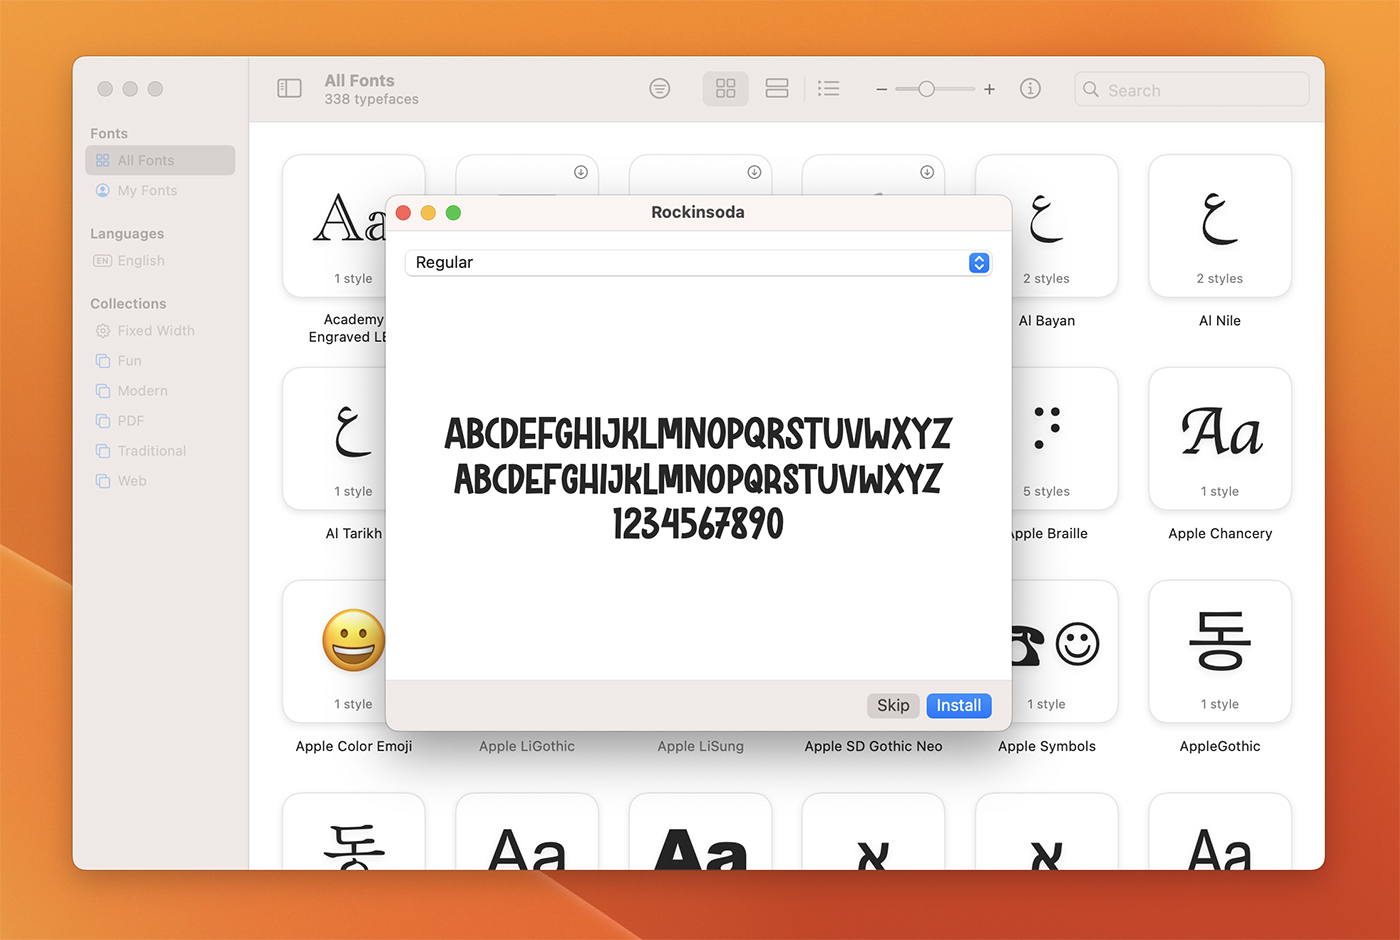
- Double-click the font file to open the font preview window.
- Click the “Install Font” button in the lower-right corner of the font preview window. This will add the font to your system and make it available for use in InDesign and other applications.

Accessing Installed Fonts in InDesign
Once you’ve installed a font on your computer, it should automatically be available for use in InDesign. To access the installed font, follow these steps:
- Launch Adobe InDesign and open an existing document or create a new one.
- Select the Text Tool (T) from the InDesign toolbar, or press the “T” key on your keyboard.
- Click within a text frame to place the text cursor, or create a new text frame by clicking and dragging on the document canvas.
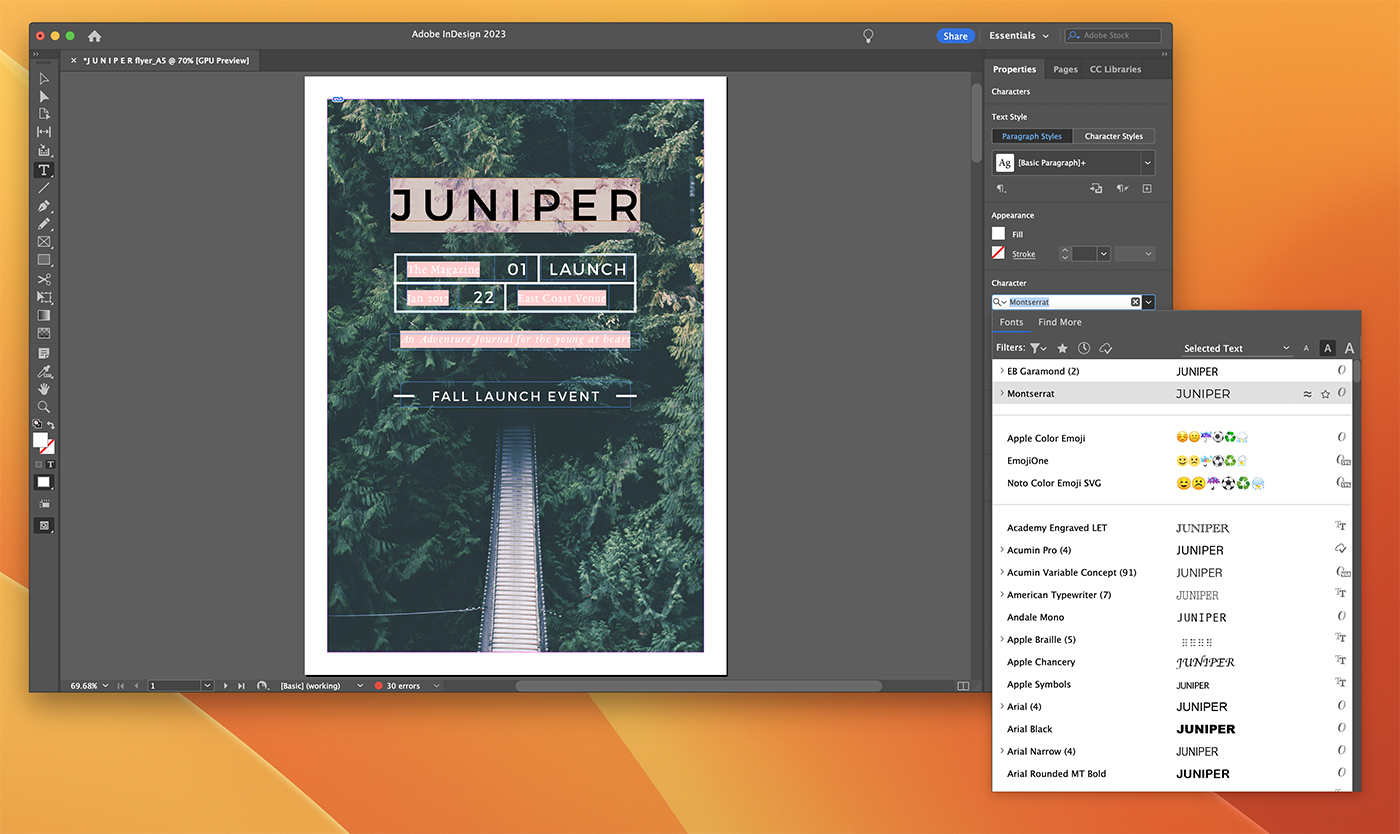
- With the text cursor placed within a text frame, open the Character panel by clicking “Window” > “Type & Tables” > “Character” in the top menu bar.
- In the Character panel, click the “Font Family” dropdown menu to view a list of all installed fonts on your computer.
- Locate the font you want to use and select it from the list. The selected font will now be applied to the text within the text frame.

Troubleshooting Font Issues
In some cases, a font may not appear in InDesign even after being installed on your computer. If this happens, try the following steps:
- Ensure that the font file is not corrupted or damaged. If you suspect a problem with the font file, try downloading it again from a reputable source.
- Close InDesign and restart the application. In some cases, InDesign may need to be relaunched to recognize newly installed fonts.
- Make sure that the font is compatible with your version of InDesign. Some fonts may only be compatible with specific versions of the software.
- Check whether the font is installed in the correct system folder. On Windows, font files should be placed in the “C:\Windows\Fonts” folder. On macOS, fonts should be located in the “/Library/Fonts” or “~/Library/Fonts” folders.
Conclusion
Adding custom fonts to InDesign is a simple yet powerful way to enhance the visual appeal and professionalism of your design projects. By following the steps outlined in this article, you can easily install fonts on your computer and use them in your InDesign projects. Additionally, understanding how to troubleshoot font-related issues will ensure a smooth and seamless design experience.
Whether you’re working on a magazine, brochure, poster, or digital publication, mastering the process of adding fonts to InDesign is an essential skill that can elevate your design work and help you stand out in the competitive world of graphic design.
0 Commentaires